You should order your favorite pizza.🍕
Because your new WordPress site could be live before your pizza delivery arrives.
Yes, you heard that right! With the innovative power of ZipWP AI, you can create a WordPress site in 5 minutes. The days of tedious setups are over.
No more plugin installations, complicated settings, or overthinking on design elements.

ZipWP AI simplifies the process. It makes website creation as easy as a few clicks.
This site will include multiple pages such as the home page, contact page, services page, and more. Each page will have well-written content and relevant images, creating a complete and professional website.
Ready to meet the FLASH ⚡ of website creator? Let’s get started!
Introducing ZipWP AI: Website Creation Superhero🦸♀️
ZipWP AI is here to change the way you build WordPress sites. This tool uses artificial intelligence to help you create a WordPress site in just a few clicks.
Even a beginner can navigate and can launch a professional-looking website in no time.
Blank Sites: Create a test website to try themes, test plugins, experiment with design elements or functionality. It also includes pages and sample posts to simplify your testing process.
Complete Sites with AI: Create professional-looking websites tailored to your instructions. They come with all necessary pages, well-written content, and royalty-free images. Plus, you get social media branding and more.
But for now, let’s focus on what brought you here: creating your WordPress site in just 5 minutes.
Step-by-Step: Create a WordPress site in 5 minutes 🙌
Go to zipwp.com and login to the ZipWP dashboard.
Click on the ‘Create New’ button and select ‘Complete Website’.


Step-1:
Add Name & Select Language
Enter website name, search for your business and select language.
Step 2:
Add Business Details
Describe your business in this step. You’ll see an example to guide you in adding details about your own business. ZipWP AI will also assist you in optimizing your content, ensuring it’s clear.
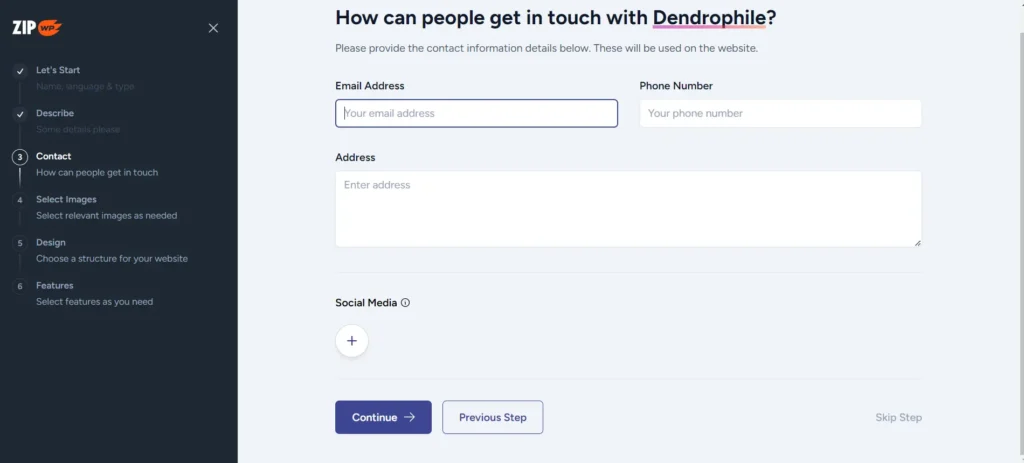
Step-3:
Add Contact Details
ZipWP asks for contact no, email, address and social media accounts.
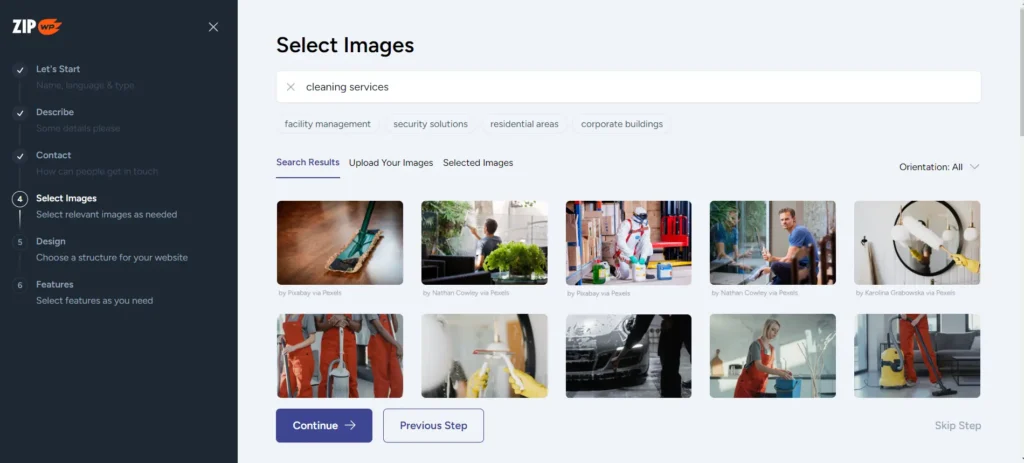
Step-4:
Select Images
ZipWP will show the images related to your business and you just need to select as per your requirements.
Step 5:
Choose Your Structure
Based on your details, ZipWP will present several website structures with different styles, color combinations, and formats.
If you find one you like, simply click on it. You can then add your site logo and experiment with different color palettes and fonts.
I fell in love with ZipWP when I saw how the site structure looked in different responsive modes. Check it out for yourself – it’s perfect and looks amazing in every device mode.
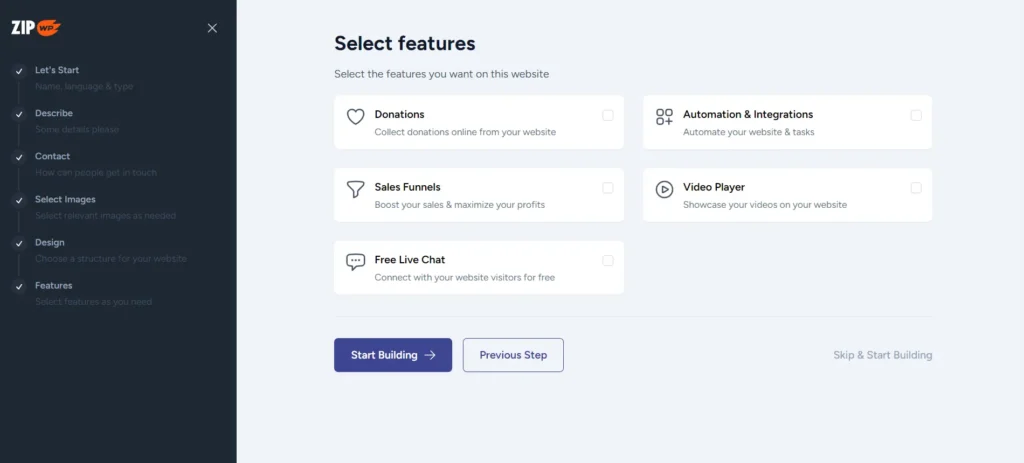
Step 6:
Select Features
ZipWP will recommend a few features like live chat, video player, and sales funnel that you might need on your site. You can choose the ones you want or click “Skip & Start Building.”
And just like that, your site draft is ready.
So, did your pizza show up yet? 🍕😅
One thing to note is that your site will be built using the Spectra Blocks. Both products have good reviews. Additionally, I’ve written a detailed review of Spectra Blocks, covering its performance, SEO, and other features.
Now we have one thing left: migrating your site to your hosting provider.
Please note, with the ZipWP free account, your site will vanish after 24 hours.
If you need to experiment with the design and keep it longer, you’ll need to upgrade to ZipWP Pro.
You can upgrade to the pro later on. For now let’s migrate the site to your hosting provider.
With the ZipWP pro,
Final Steps: Migrate the Site to Hosting Platform🌐
To explain the process, I’ll take an example of this Dendrophile site.
Imagine your ZipWP website URL is dendrophile.zipwp.com. Now, you’re ready to move it to your own domain, dendrophile.com.
Step 7:
Get Your ZipWP Site Ready for Migration
Before you start migrating your website, prepare the following:
Change Admin Password: Update the admin password of your ZipWP website. You will need this password to log in after the migration.
Install All-in-One WP Migration Plugin:
Make sure you have the All-in-One WP Migration plugin (or another migration plugin) installed on your ZipWP site. This plugin will help in the migration process.
Pro Tip: The All-in-One WP Migration plugin is free and works for sites under 64 MB. If your site is larger, use another plugin like MigrateGuru, which has no size limit. The migration steps are similar for both plugins.
Step 8:
Exporting and Importing Your ZipWP Site
Now that you’ve completed the prep work, follow these steps to move your ZipWP site to your hosting:


Steps A to D:
A. Open the All-in-One WP Migration plugin on your ZipWP site.
B. Select the Export option and save the website file.
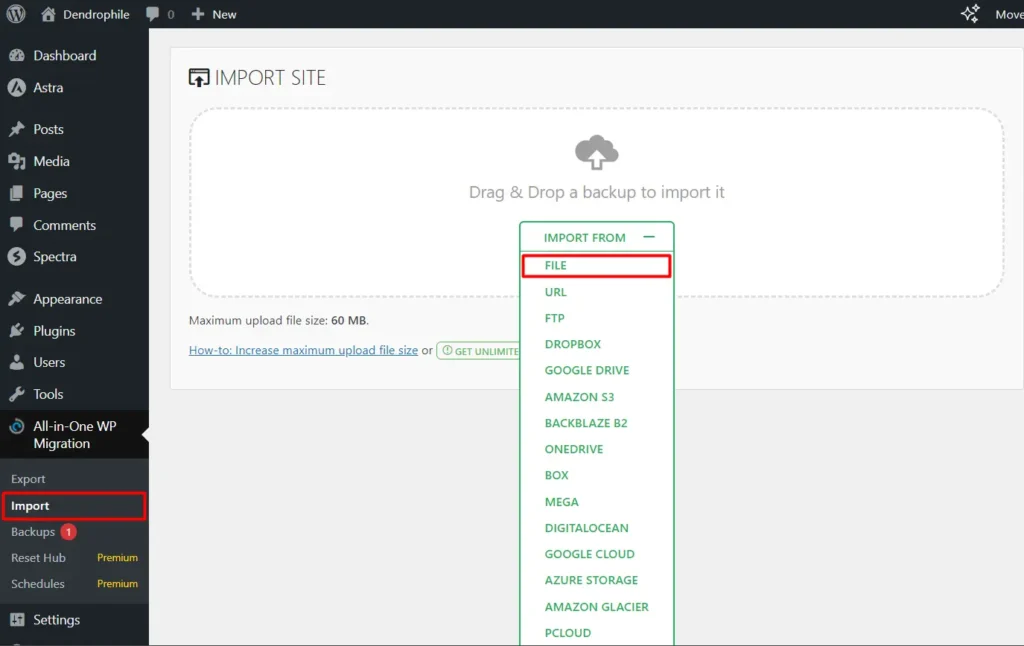
Next, access your new WordPress installation on your hosting platform:
C. Install the All-in-One WP Migration plugin on the new site.
D. Select the Import option and upload the saved website file.
The migration will start, and once it’s done, your ZipWP site will be transferred to your hosting.
Now, log in to the new site using the same username and password from your ZipWP site.
Ready, Set, Launch! 🚀
And there you have it! You’ve just created and launched a stunning WordPress site.
So with ZipWP, you can create a WordPress site in 5 Minutes. Whether you’re a pro or a newbie, ZipWP takes the hassle out of web design. It lets you focus on what matters most – The Pizza😂 .
Don’t forget to drop a comment below and share your ZipWP experience. I’d love to hear about your amazing new site.
Happy Building! 🤝
4 Comments